How to Fully Clean and Secure a Hacked WordPress Website
Did you know that over 13,000 WordPress sites get hacked every single day?
Yeah, you’ve heard it right. Even that number is way higher than investigations often report. And WP Guard sees the aftermath of these hacks daily, so trust us when we say “panicking never helps”.
If your site has been hacked, you’re probably staring at a screen full of warnings right now and wondering where to start. This guide walks you through exactly how to clean a WordPress hack step by step.
Here’s what we’ll cover:
- Spotting the first signs your site has been hacked
- Backing up and scanning before you touch a single file
- Cleaning core website files, plugins, themes, and the database
- Confirming the hack is fully gone
- Locking things down so it doesn’t happen again
Let’s dig in.
Step 1: The First Signs Your Site Has Been Hacked
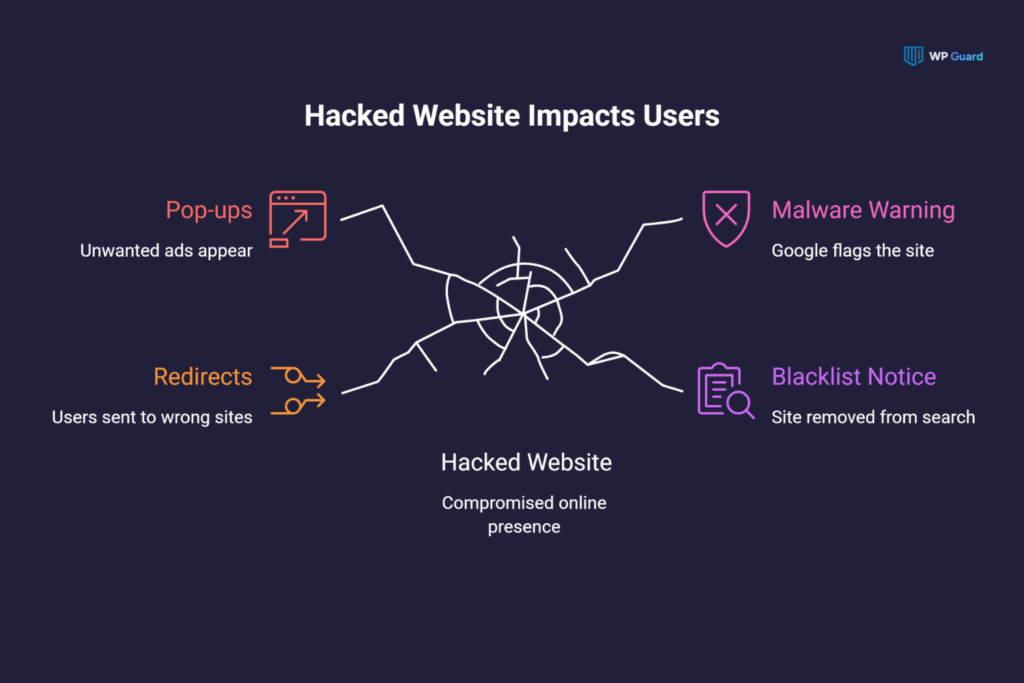
Most hacked WordPress sites show warning signs days before the owner even notices.
In practice, a hacked site leaks small clues through the browser, search results, or customers asking about something unusual they’ve spotted on your website. Once you know where to look, those clues become much easier to recognise.
So let’s look at the two most common signs:
Strange Redirects and Pop-Ups on Your Hacked Site
The first clue usually shows up right on the page itself.
Visitors land on your homepage, then get bounced to a random pharmacy ad or a fake prize page they never asked for. Sometimes it’s subtler, like a pop-up that appears out of nowhere asking them to download something.
This happens because hackers inject malicious code into your theme files or database, which triggers the redirect the moment someone loads the page.
Quick Tip: If even one customer mentions this to you, take the issue seriously because it indicates the hack has been sitting there for a while.
Google Warnings and Blacklist Notices
The second clue comes entirely from outside your site. Basically, if your site has been sitting hacked long enough, Google will catch it before you do.
You’ll see:
- Malware warnings pop up in search results next to your listing
- A full red warning screen that blocks visitors from loading your hacked website
Once Google flags a site for these errors, your search engine rankings can drop within days.
Step 2: What to Do the Moment You Suspect a Hacked WordPress Site
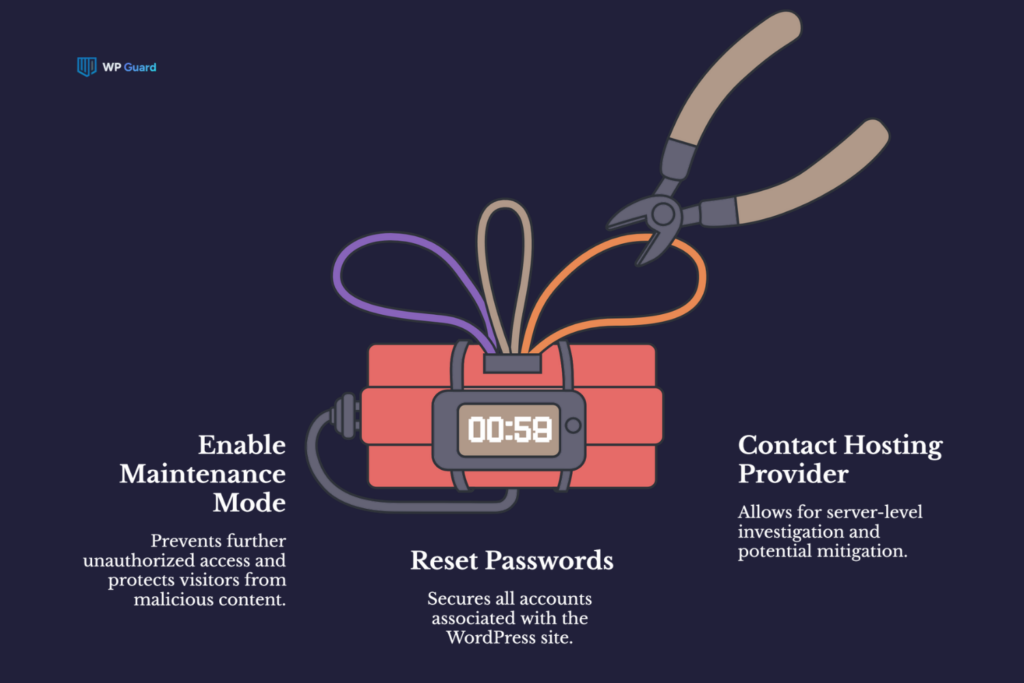
You need to take the site offline, change every password, and contact your host before doing anything else.
After being hacked, most site owners start clicking around, checking files, maybe deleting something that looks suspicious. We get this instinct, but poking around a hacked WordPress website without a plan can overwrite evidence you’ll need later. Plus, it can make the cleanup harder than it has to be.
Instead, do these three things first, in the following order:
- Put Your Site in Maintenance Mode: This keeps site visitors from landing on a compromised page and getting hit with whatever the hacker planted there.
- Change Passwords Across Every Access Point: Includes your WordPress login, hosting account, FTP credentials, and your database password.
- Contact Your Hosting Provider Immediately: Your host can see activity logs on the web server that you can’t access. So if things are serious, they can sometimes isolate the entire site at the server level while you work through the cleanup.
While these steps don’t fix the hack on their own. But they obviously stop it from getting worse while you get ready to clean things up properly.
Step 3: Running a Malware Scan to Find the Damage
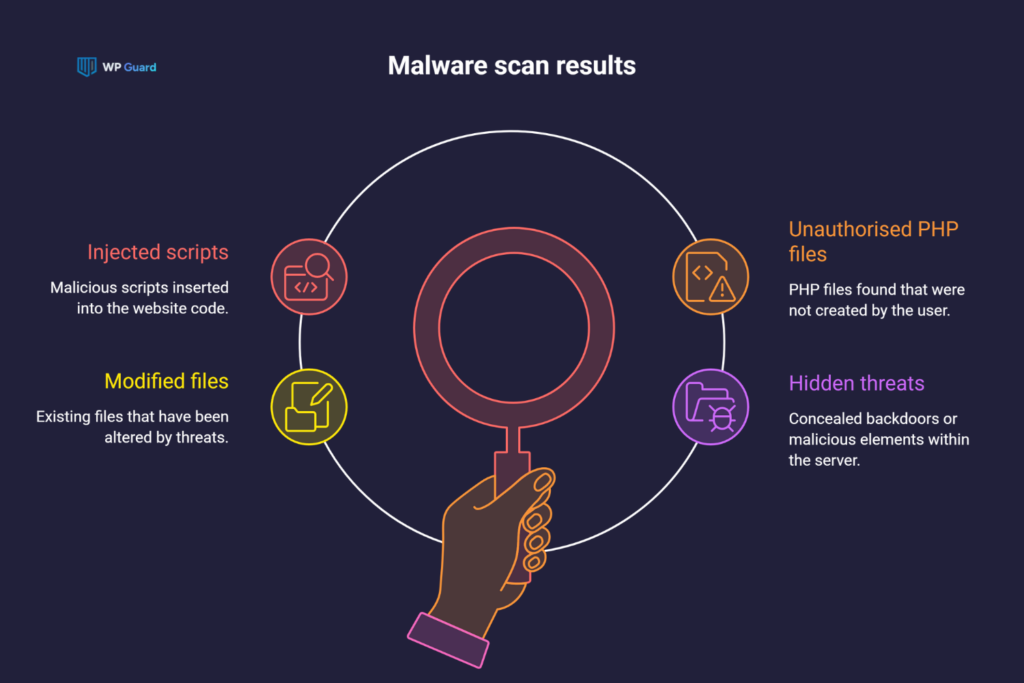
Obviously you can’t clean what you can’t see. That’s why you need a full picture of the damage ahead of removing anything. In this case, a malware scan shows you exactly what the hacker touched and what they left behind.
But two aspects of the scan you should understand before you run it:
Free vs Paid Malware Scan Tools
Several solid options exist for scanning a hacked WordPress site, but the right choice depends on your needs. A quick comparison of the most common choices:
| Tool | Cost | What It Covers |
| Sucuri SiteCheck | Free | Surface-level scan of publicly visible WordPress malware and malware warnings |
| MalCare | Free/Paid | Free scanning and firewall. Paid plan required for viewing infected files and one-click malware removal |
| Solid Security | Free/Paid | File integrity checks and security threats monitoring |
| WP Guard | Free/Paid | Free security scans. Paid plans add deeper malware, vulnerability scanning, monitoring, recovery, and protection. |
Our free WP Guard scan is a great starting point for spotting security issues. For deeper protection, our paid plans scan your actual WordPress files to uncover malware, vulnerabilities, and hidden threats that surface-level scans can miss.
What a Malware Scan Actually Looks For
A website scan doesn’t just hunt for obvious corrupted files. You can even cross-reference every file on your WordPress site against a known clean version to flag anything that someone added, changed, or shouldn’t have placed there.
Specifically, it looks for:
- Injected scripts inside your theme files
- Unauthorized PHP files in directories they don’t belong in
- Infected files that hackers modified to call external servers
However, these aren’t the only signs of an infection. Some security threats, like hidden backdoors, stay out of sight until an attacker uses them again.
That’s exactly why cleaning the core files is the next crucial step.
Step 4: How to Clean a WordPress Hack From the Core Files
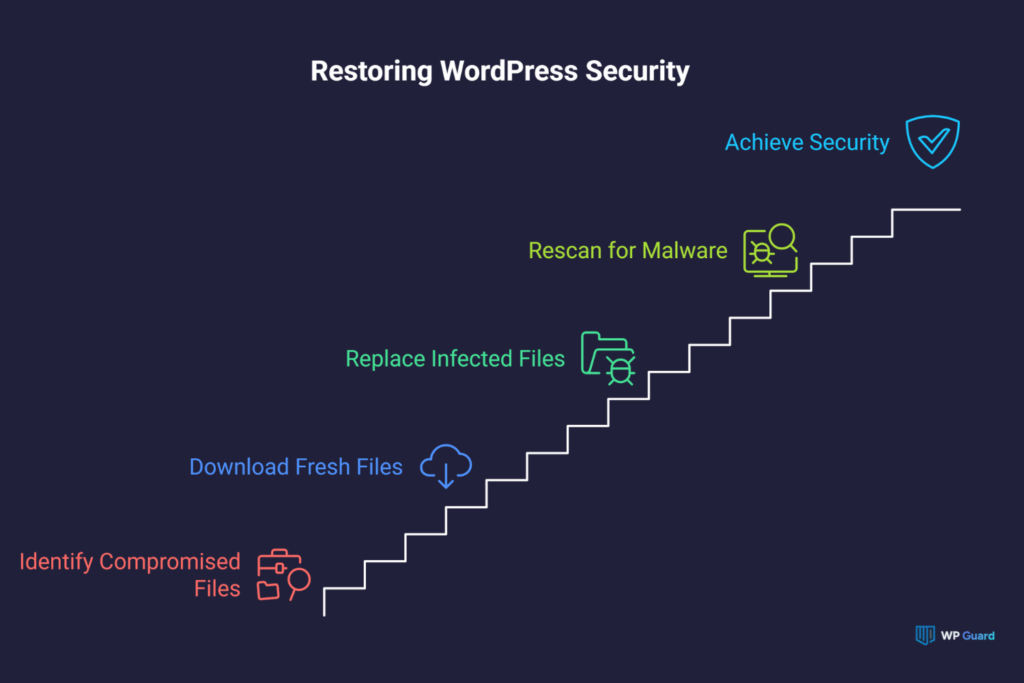
To clean the core files, you have to reinstall fresh WordPress core files and replace anything a hacker altered with the original, untouched code.
Generally, when we clean a hacked WordPress site, the core files are always the first place we should check. Hackers know most site owners focus on plugins and themes. So they bury malicious code inside WordPress core files where you’ll barely notice (obfuscated code in your root folders is a classic sign of this).
Fortunately, WordPress developers build the core from files that should never change between versions. So if anything inside your wp-admin or wp-includes directories looks different from a clean WordPress installation, hackers have tampered with them.
Now, let’s have a look at how to replace them without breaking your site:
- Step 1: Download a fresh copy of WordPress directly from WordPress.org.
- Step 2: Extract the .zip file on your computer.
- Step 3: Delete the wp-admin and wp-includes directories from your server using your file manager or FTP client.
- Step 4: Upload the fresh wp-admin and wp-includes folders from the downloaded copy into your root folders.
- Step 5: Upload all the loose PHP files from the root of the downloaded copy, overwriting the existing ones.
Before you start, run through this checklist:
- Do NOT delete or replace the wp-content folder (your themes, plugins, and uploads live here)
- Do NOT touch wp-config.php (your database credentials are stored here)
- Confirm you downloaded the same WordPress version your site is running
- Have your backup ready in case something goes wrong mid-upload
After uploading, run another malware scan to confirm the hacked WordPress core files are fully replaced.
Step 5: Finding and Removing Malicious Code in Recently Modified Files
To put it simply, sorting files by modification date narrows down exactly where the hacker made these changes.
Although core files are one entry point, hackers rarely stop there. They further spread malicious code across multiple locations, and recently modified files are the quickest way to trace exactly where they’ve been. Think of it as following their footprints through your server.
Before finding and removing malicious code, you must know these two things first:
How to Spot Recently Modified Files
Your hosting file manager shows modification dates next to every file, but sorting through hundreds of files manually takes forever.
So a faster method is running this SSH command directly on your web server:
| find /your-site-root -name “*.php” -mtime -10 |
This returns every PHP file modified in the last 10 days. You can even swap out “-10” for a longer window if you’re not sure how long the hack has been active.
Remember to cross-reference the dates against your own activity too. If you haven’t touched a file but it shows a recent modification, that’s a red flag you should investigate immediately.
Pro Tip: Pay close attention to files that changed outside a recent plugin or theme update. It’s because unexpected modifications on these files often indicate unauthorized changes like data alteration.
Common Places Malicious Code Hides
You don’t need to inspect every file on your website to find malicious code. Instead, starting with the locations attackers commonly target can save time and help you spot suspicious code sooner.
These are the locations we check first on every hacked WordPress site:
- The wp-content/uploads Folder: Look for PHP files here since legitimate uploads should never contain executable PHP code.
- Active Theme Files: Any unfamiliar code block at the top or bottom of the functions.php file is almost always malicious.
- Custom Files and Inactive Plugins: Any plugin you no longer use (e.g., custom files in inactive plugin folders) is a potential hiding spot for hacked files.
You have to carefully remove any suspicious code you find in these locations, line by line, against a clean reference copy of the same file.
Step 6: Cleaning Malicious Code From Theme and Plugin Files.
Once you’ve handled the core, your plugins and themes need the same level of attention. This is where malicious files blend in the easiest and look completely normal from the outside.
Now, follow these conditions to clean malicious code:
Condition 1 – If premium plugins and themes are available on the repository:
The cleanest way to handle WordPress plugins and WordPress themes is to delete them entirely and reinstall fresh copies from the official WordPress repository. However, don’t try to scan line by line through every WordPress file in a plugin folder (there can be hundreds of them) when a clean reinstall takes two minutes.
Condition 2 – If premium plugins and themes are not available on the repository:
You’ll need to download a fresh copy from the original developer and manually replace your existing installation. So compare your current files against the clean version and remove any code block that doesn’t match.
Most importantly, check these specific files across all your plugins and themes:
- functions.php
- index.php
- header.php
- footer.php
Hackers target these files more often than any others because they load on every page request. So any unfamiliar code block at the top or bottom of these files is almost certainly malicious code that needs to go.
Now that the files are clean, it’s time to check who actually has access to your site.
Step 7: Checking the WordPress Dashboard for Hidden Admin Accounts
Cleaning WordPress files means nothing if a rogue admin user is still sitting in your dashboard with full access. In practice, hackers routinely create hidden admin accounts during a breach, and they’re easy to miss due to their legitimate design.
To flag this, log into your WordPress admin area and head straight to Users. Then look through every account carefully to find any user account you don’t recognize, especially one with administrator access. If you find such accounts, remove them immediately.
Here’s a list of what to check across your WordPress users:
| What to Check | Action |
| Unknown Admin Accounts | Delete it. Then reset your own wp admin credentials right after. |
| Suspicious Email Addresses | If the email doesn’t match your team, remove that user account immediately. |
| Recently Created User Accounts | Sort active users by date. If you find anything that you don’t recognize, delete it. |
| Idle Accounts With High Permissions | Delete old WordPress admin accounts nobody uses, or drop them to a lower role. |
Useful Tip: Keep your admin accounts limited to people who genuinely need that level of access. Every extra administrator is an open door for vulnerability.
Step 8: Removing Malware From the Database, Not Just the Files
Most people stop at the files and call it done. But that’s a mistake we see constantly. In several cases, hackers inject malicious code directly into the WordPress database, as it includes wp_options and wp_users tables that load on almost every page request.
To access your database, grab your database credentials from the wp-config.php file. From there, log into phpMyAdmin through your hosting account and start checking.
These are the specific spots worth inspecting closely:
- The wp_options Table: Look for suspicious URLs or unfamiliar scripts sitting inside the siteurl, home, or active_plugins rows.
- The wp_users Table: Cross-check every entry against the admin accounts you just cleaned in the WordPress dashboard. If any user reappears here after you deleted him from the dashboard, the hacker embedded it directly in the database.
- The wp_posts Table: Hackers sometimes inject hidden links or iframe code inside post content. That’s why you should search for anything containing “eval(“, “base64_decode(“, or “iframe” that you didn’t put there yourself.
With these foundations in place, removing malware from the database becomes a matter of deleting the specific infected rows rather than wiping everything. However, you should never delete files or rows blindly without confirming what they do.
Step 9: How Do You Know the Hacked WordPress Site Is Actually Clean?
You can assume the site is clean once a fresh scan comes back clear and the blacklist warnings are gone. We’ve seen sites pass an automated scan and still have a rogue redirect sitting in the database. So run the scan, but verify manually too.
Follow this checklist to confirm your hacked site is actually clean:
- Run a fresh malware scan and confirm zero infected files flagged
- Check Google’s Safe Browsing Status Tool to confirm Google no longer flags your site
- Log into Google Search Console and submit a review request under “Security Issues” to remove malware warnings
- Request a review from antivirus vendors like McAfee if your site appeared on their blacklist
- Fill in a review request form for each blocklisting authority that flagged your hacked website
- Revisit your admin accounts, recently modified files, and database tables one more time to confirm nothing was missed
In short, fixing a hacked WordPress site doesn’t end at cleanup. You also need to remove your website from blacklists before your search rankings and visitor traffic can recover.
Step 10: Locking Things Down So It Doesn’t Happen Again
That said, the cleanup only counts if you close the door the hacker used to get in.
Initially, a hacked WordPress site cleaning feels like a win. But we’ve seen sites get reinfected within 48 hours because the owner cleaned everything without securing the site. As a result, the hack came back through the same door.
To prevent future hacks, the two areas below cover the majority of reinfection cases:
Strong Passwords and Two-Factor Authentication
Your WordPress password is the first line of defense for your entire site’s security. For that reason, reset every credential connected to your WordPress installation after a cleanup (e.g., your hosting account, FTP, and database password).
You can also use a password manager to generate strong, unique passwords for each access point (reusing passwords causes re-attack). Then enable two-factor authentication for every WordPress admin account so no one can access your wp admin even with a password.
Setting Up a Website Firewall
A web application firewall sits between your site and incoming traffic, and filters out malicious requests before they ever touch your files or database. After a hack, this is a baseline rather than an optional web security measure.
Fortunately, most WordPress security plugins include a basic firewall option. So update all plugins and themes to their latest versions at the same time, since outdated components create a door for future hacks.
Getting Back to Business, Safely
A hacked WordPress site feels overwhelming at the moment, but the process is manageable when you take it one step at a time. Regular updates, active monitoring, and a clean backup on standby are what keep a one-time incident from becoming a recurring headache.
Rather not deal with any of this yourself? That’s exactly what WP Guard is here for. Our team handles malware removal, ongoing WordPress website monitoring, and security hardening so you can get back to running your business.
Quick Answers About Cleaning a Hacked WordPress Site
These quick answers cover the questions we hear all the time after a hack.
1. Can I restore something from a backup instead of manually cleaning?
Yes, restoring from a clean backup is the quickest way to recover a hacked WordPress installation. But it only works if you kept the backup before the hack happened. Otherwise, restoring an infected backup puts you right back where you started.
2. Can I manage this WordPress hack remotely?
Yes, most of the cleanup steps in this guide can be done remotely through your hosting account’s file manager, phpMyAdmin, and the WordPress dashboard. You don’t need physical server access to clean a hacked site.
3. Do I need a developer to clean my hacked site?
Not always. But if the WordPress hack has spread across multiple entry points or keeps coming back, bringing in a professional is a wise decision.