How to Request a Google Security Review After Cleaning Your Site
When you clean a hacked site, Google’s “dangerous site” warning doesn’t automatically disappear. In fact, some site owners don’t realize the warning stays live for every visitor until a formal review gets approved. WP Guard is here to show you exactly how to request a Google security review appropriately.
All you need to do to remove the warning is submit a review through Google Search Console. We’ll walk you through exactly what to do, field by field, so nothing gets missed.
If you ignore the review request, your site will keep displaying safety warnings to every visitor who lands on it. And Google will continue to suppress it in search results, which will reduce your traffic significantly. That’s a problem no clean site should have to carry.
Without further delay, let’s get into it.
How to Request a Google Security Review: A Step-by-Step Walkthrough
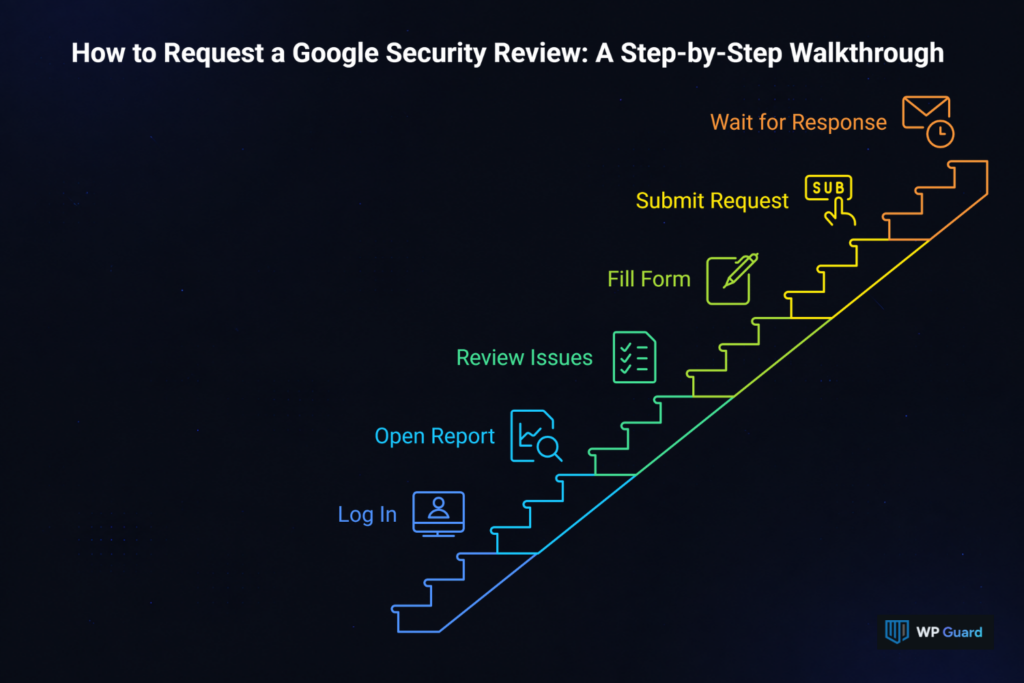
To request a Google security review, you need to go through Google Search Console in a specific order. Skipping a step or rushing the process is how most requests end up denied.
Here’s a step-by-step on exactly what to do.
Step 1: Log Into Google Search Console
You need a verified Search Console account tied to the affected site. Without verification, you won’t see any security alerts or get access to the review request department. Head over to search.google.com/search-console and sign in with the Google account linked to your site.
Step 2: Open the Security Issues Report
Once you’re in, go to the Security and Manual Actions section in the left sidebar. The Security Issues tab shows every problem Google has filed against your site. If nothing shows up here, Google may have already cleared the flag on its own.
Step 3: Review and Confirm All Issues Are Resolved
Each flagged issue has a dropdown with details on what was found on your page. You must confirm every single listed issue is resolved, instead of just the most recent one. Submitting with anything unresolved is the fastest way to get your request rejected.
Step 4: Fill Out the Direct Request Form
The form asks you to confirm the cleanup and describe the steps you took. And by specific, we mean genuinely detailed. Vague answers like “I fixed it” won’t satisfy Google’s reviewers. Mention the tools you used, the files you removed, and any security measures you put in place after the cleanup.
Step 5: Submit Your Request Application Form
Once the form is complete, hit the Request a Review button inside Search Console. Google logs the exact time your request gets filed, so don’t submit until everything is genuinely resolved. You can only submit one request per issue type at a time, so make it count.
Step 6: Wait for Google’s Response
Google typically responds within a few days to a few weeks, depending on the issue type. You’ll get an email notification once the review wraps up. If it’s granted, the security warning comes down, and your Safe Browsing status gets restored.
Before You Submit: What Google Needs to See First
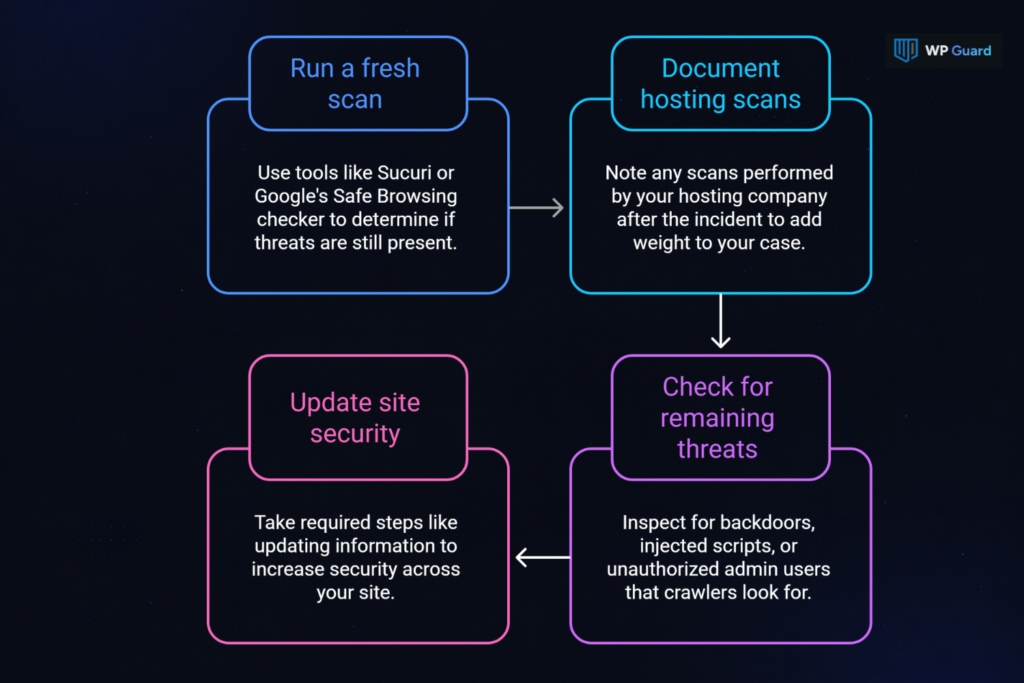
Most review requests get rejected because it isn’t verified clean. Fixing an infection and proving it’s gone are two separate things, and Google only responds to the second one. Without solid evidence, your submission won’t move forward.
Start by running a fresh scan on your site. Tools like Sucuri or Google’s own Safe Browsing checker can help you determine whether any threats are still present on your server. If your hosting company ran a scan after the incident, note that detail too, as it adds weight to your case.
Beyond the scan, check for any remaining backdoors, injected scripts, or unauthorized admin users on your computer’s end. These are the exact things Google’s crawlers look for when they review your site.
Run a full check first to scan your WordPress site for free and get a clear picture before you submit. And once the scan is done, take the required steps, for example, updating any information, to increase security across your site before moving on.
What the Request Form Actually Asks You
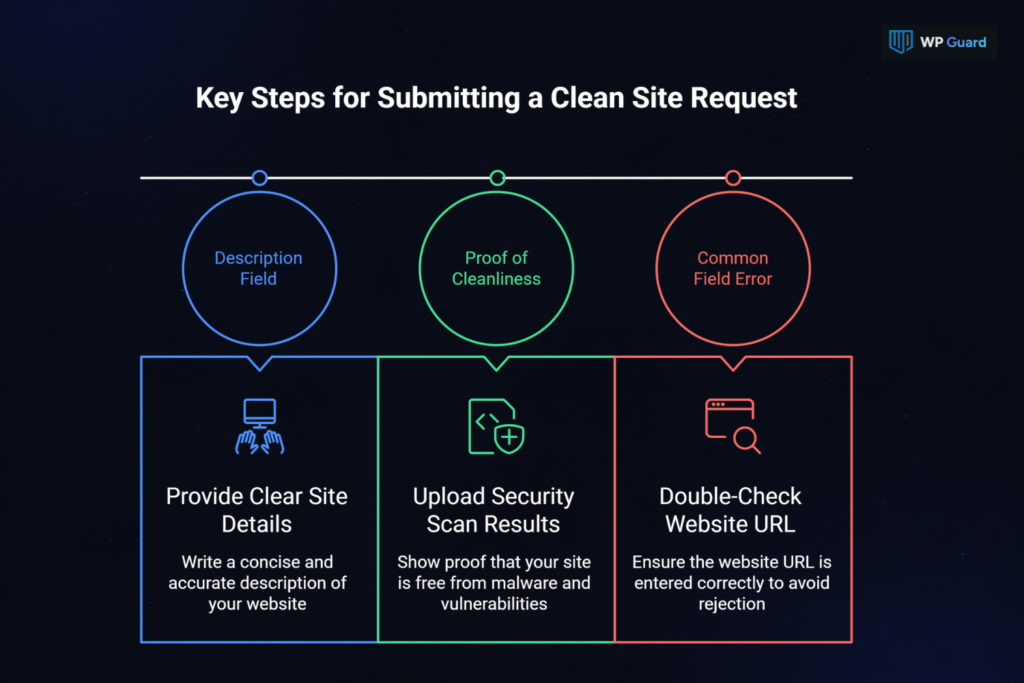
You’ll face some unexpected fields in this form, and knowing what each one expects saves you from a costly rejection. Let’s go through each part so you’re not caught off guard when you open it.
What to Write in the Description Field
This field is where most site owners either win or lose the review. Write a clear, detailed statement covering what was hacked, how you found it, and exactly what steps you took to fix it. Reviewers are looking for specifics rather than general reassurance, so every sentence in this field should point to something concrete.
So, mention dates, tool names, and file paths where you can. If you removed a malicious script from wp-includes or cleaned an injected iframe, say that. Collected records like these show Google your cleanup was deliberate, not a guess.
How to Show Proof That Your Site Is Clean
Reference a recent scan report from a trusted security tool that shows zero threats. Sucuri, MalCare, or even Google’s Safe Browsing report all work as supporting evidence here. The main purpose of clarifying the source and date of the scan inside your description is to give Google a verifiable trail. This way, Google can perform proper cross-check.
Google doesn’t ask for attachments, but specific comments about scan results can push your request into the granted column. If your host also ran an independent scan after the incident, include that detail as a second data point.
Ultimately, two clean scans from separate sources are far more convincing than one.
One Common Field People Fill Out Wrong
Many site owners check “I have fixed these issues” before actually verifying every flagged URL on the page. That checkbox is a formal confirmation, and Google treats it as one. If even a single instance still triggers a warning after you submit, the entire request gets denied.
In fact, Google cross-checks your claim against its own crawl data almost immediately after submission. So go through every flagged subject in the Security Issues report one more time before you tick that box. It takes an extra ten minutes, and it could save you weeks of waiting.
How Long Does a Google Security Review Take?
Google’s review timeline ranges from three days to a few weeks, depending on the type of issue flagged. Phishing cases tend to get resolved the fastest, often within one to three days. Malware infections, on the other hand, take longer since Google’s team has to confirm the site is fully clean before it grants anything.
That said, unforeseen delays do happen. If your site had multiple flagged URLs or a more complex infection, the review process can stretch to two or three weeks. There’s no way to expedite it, and sending added requests won’t speed things up either.
The best thing you can do is submit a clean, well-documented request the first time. A rushed or incomplete submission almost always results in a longer wait, since you’ll have to go back, fix what was missed, and file all over again.
What Happens If Google Rejects Your Request
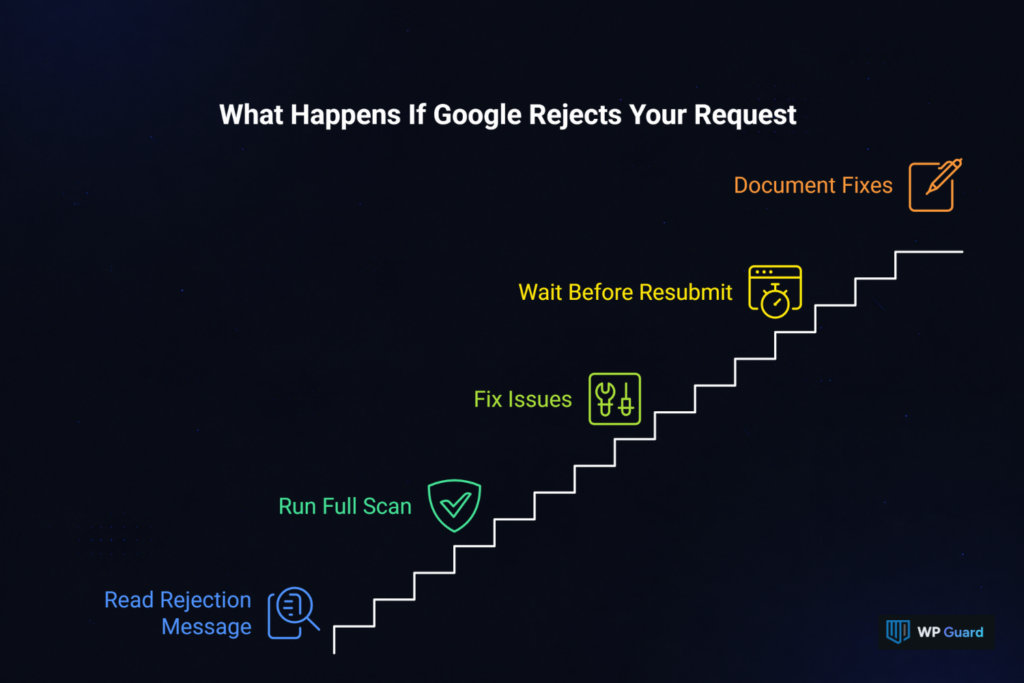
A rejection doesn’t mean the process starts over from scratch, but it does mean something was missed. Google will politely notify you through Search Console and sometimes via email, with a message that clarifies why the request didn’t pass. From there, it’s on you to act fast.
Here’s what to do after a denied request:
- Read the Rejection Message Carefully: Google’s feedback will point to the specific issue that held your request back. Don’t skim it. Every word in that comment is there for a reason.
- Run Another Full Scan: Go back to your security software and run a fresh scan across your entire server. Look specifically for anything that wasn’t caught the first time around, like hidden backdoors or re-injected scripts.
- Fix Every Remaining Issue: Address each flagged item one by one before you seek a next request. Partially cleaned sites get denied again, and that only adds more time to your wait.
- Wait Before You Resubmit: Don’t file a new request the same day. Give it at least 24 hours after resolving everything, so Google’s crawlers have time to register the changes on your page.
- Document What You Fixed: When you resubmit, your description needs to reflect the new changes too. Note exactly what you found, what you removed, and what you did differently this time to clean a hacked WordPress site properly.
So, getting denied once doesn’t disqualify you from a successful review. Most sites that go through the process a second time get granted, as long as the resubmission is thorough and honest.
How to Immediately Respond If the Warning Comes Back
A warning that returns after approval is almost always a sign the original cleanup wasn’t complete. It doesn’t mean Google made an error. Instead, it means something was left behind, and the crawlers found it on a subsequent visit to your site.
When that happens, immediately respond by running a fresh deep scan across your entire server. Look specifically for backdoors, re-injected scripts, or any suspicious code that wasn’t there during your first cleanup. These tend to hide in theme files, the wp-includes folder, or inside database entries that basic scans sometimes miss.
Once the scan is done and every threat is confirmed removed, you can seek a second review request.
Either way, you must go through the description field even more carefully this time. Google’s reviewers will cross-check your second submission against the first, so any gaps in your account of what happened will work against you.
Mistakes That Get Review Requests Denied
The most common mistake is submitting before the site is fully and verifiably clean. And honestly, most of these errors are avoidable.
Here are the ones we see come up again and again:
- Submitting Too Early: This is the biggest one. Even one infected file left on your server is enough for Google to deny the whole request. Run a full scan and confirm every flagged URL is clear before you hit submit.
- Writing Vague Descriptions: Google’s reviewers go through dozens of these forms every day. A description that just says “I removed the malware” gives them nothing to work with. The best way to do it is to walk them through what your security software found, which files you removed, and what records you kept.
- Ignoring Google’s Guidelines: Search Console has specific guidelines on what a valid cleanup looks like. If your process didn’t follow those steps, your request won’t hold up regardless of how clean your site actually is.
- Leaving Suspicious Redirects Active: Many site owners fix the obvious infection but overlook unauthorized redirects still sitting in their .htaccess file or server configuration. Google flags these as active threats, and your request gets denied on that basis alone.
- Using Unverified Ownership: If the Google account you used to file the request doesn’t have verified ownership of the site, Google won’t act on it. Double-check your property verification status before you submit anything.
That covers the most frequent slip-ups. Each one is fixable, and being aware of them before you submit puts you well ahead of most site owners going through this process.
Review Timelines by Issue Type: A Quick Reference
Now that you know the process, here’s a breakdown of how long each issue type typically takes. Keep in mind these are average windows, and your actual wait time may vary based on how complex the infection was.
| Issue Type | Average Review Time | Notes |
| Phishing | 1–3 days | Fastest turnaround |
| Malware | 3–7 days | Depends on infection depth |
| Unwanted Software | 5–14 days | Broader scope takes longer |
| Social Engineering | 3–5 days | Reviewed carefully |
| Harmful Downloads | 5–10 days | Less common, moderate wait |
The apparent difference in timelines across these issue types comes down to how deeply Google’s team has to crawl your site. Phishing pages are usually isolated and easy to verify, so the browser-level check wraps up fast.
Malware and unwanted software cases often involve multiple pages and server-level code. That broader scope takes more time to review, and Google won’t mark anything as granted until every layer checks out.
Your Site Is Clean. Now Make Google Agree.
Once the review is approved, your site gets its Safe Browsing status back, and those warnings stop showing up for every visitor who lands on it. That’s real value, and it’s worth going through the process properly to get there.
A clean site without a completed review still costs you traffic, trust, and money every single day it stays flagged. Google isn’t going to remove the warning on good faith alone. You have to formally file the request, back it up with evidence, and give reviewers something solid to work with.
If you’d rather have someone handle it for you, that’s exactly what we do at WP Guard. We take care of the full cleanup and walk you through the review process so nothing gets missed.