WordPress Malware Removal: A Complete Cleanup Guide
Your WordPress site got hacked, and now you’re staring at a screen full of problems you didn’t ask for. We’ve seen WP Guard clients report this exact situation multiple times. To be honest, a hacked site doesn’t fix itself, and the longer it sits, the worse the damage gets.
On top of that, you can’t remove malware just by deleting one or two bad files. It’s a methodical process: find the infection, clean it out, and close every door it came through. Skip any of these steps, and you’re back to where you were within days.
This guide walks you through the full WordPress malware removal process from start to finish. We’ll also cover:
- How to spot a hacked site and what to do first
- Where malicious code hides and which files to inspect
- How to secure your site to stop future attacks
Read on, and let’s sort your site.
How to Tell If Your WordPress Site Has Malware
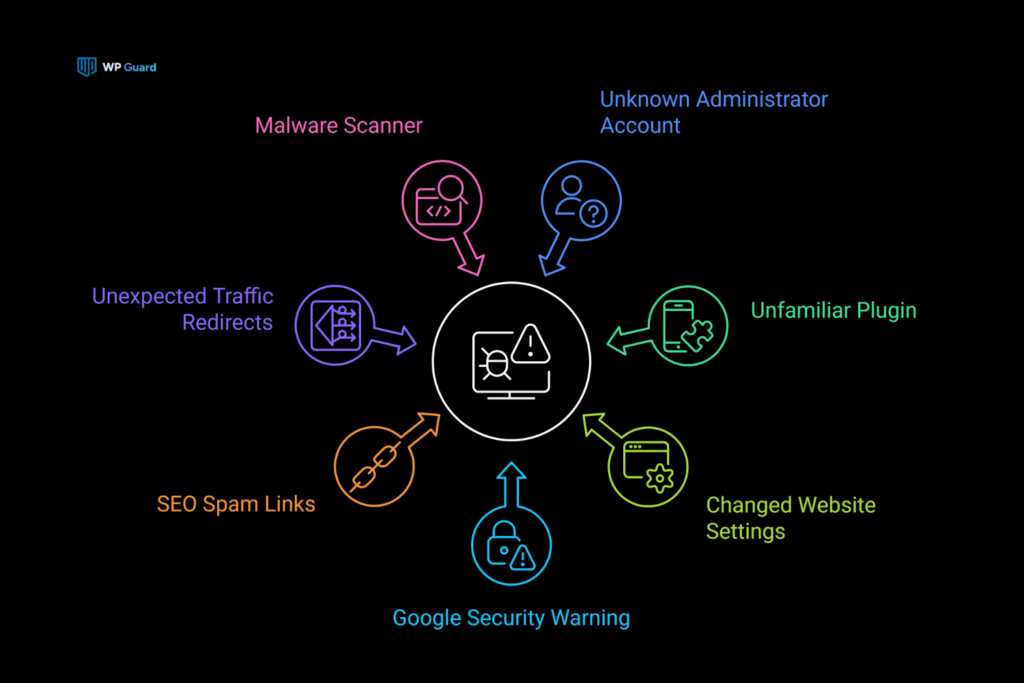
Your site has malware if you notice unauthorized admin accounts, unexpected redirects, or your hosting company has suddenly suspended your account. Unfortunately, most site owners don’t notice these signs until Google does or their customers report them.
Two areas of your site will show you the clearest signs of infection:
Warning Signs in Your WordPress Dashboard
WordPress malware doesn’t always make itself obvious right away. They usually show up as small anomalies first. So by the time you see them as security threats, they’re impossible to ignore (the infection has been sitting there for a while).
To spot them, look for these signs:
- Unknown admin users or newly created accounts
- Plugins you never installed showing up as active
- Changed settings or a login page that looks different
- Google Search Console warnings or blacklist notices
- SEO spam links injected into your pages
- Sudden traffic drops or redirects to unknown sites
Any one of those issues is worth investigating. But if you flag two or more, you almost certainly need to remove the threat from your site immediately.
What a Malware Scanner Will Show You
A malware scanner compares every file in your WordPress installation against known clean versions and flags anything that looks suspicious. And detecting malware this way takes minutes instead of hours.
During this process, scanners surface injected malicious code, backdoors, and recently modified files you’d never notice just by browsing around.
One tool that helps with this process is the WP Guard scanner, which offers a free WordPress plugin for malware scanning. It catches website malware even experienced developers often miss in the first pass. But for deeper infections, a professional malware removal service can take over.
Suggestion: Run a threat analysis before touching anything else. It gives you a clear picture of the malware scope, so you know which documents need attention first.
Before You Start: What to Do First
Jumping straight into cleanup without preparation can make recovery much harder. In fact, deleting the wrong document, overwriting valuable evidence, or changing infected files too early can leave malware behind or even break your website.
So before you touch a single WordPress file or open your file manager, there are a few things you need to complete.
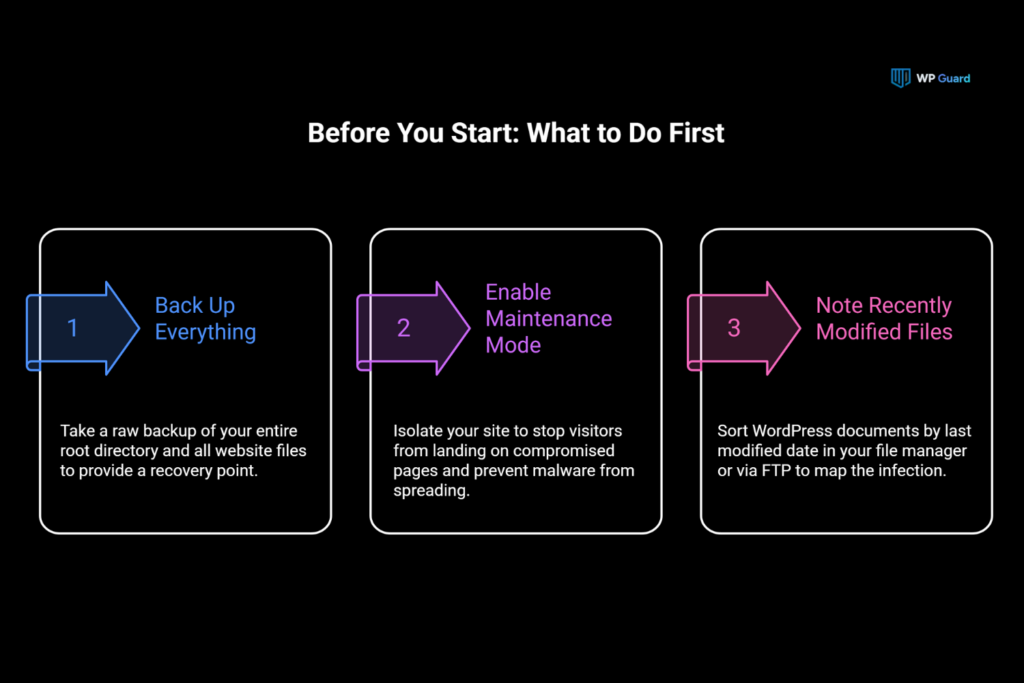
1. Back Up Everything
Take a raw backup of your entire root directory and all website files (that include infected backup files). It gives you a recovery point if something goes wrong during cleanup.
Ideally, you’d already have a clean backup to restore from, but many site owners don’t. If that’s the case, your hosting provider usually offers a one-click backup option from the control panel, so start there.
2. Put the Site in Maintenance Mode
Isolating your site immediately stops visitors from landing on compromised pages. It also prevents malware from spreading further while you work.
To do that, most hosting providers let you enable maintenance mode directly from the dashboard, or you can do it through a plugin in under a minute.
3. Note Your Recently Modified Files
Open your file manager or connect via FTP (File Transfer Protocol) and sort your WordPress documents by last modified date. This step gives you a map of exactly where the infection started. And site owners who don’t follow this step often spend hours cleaning files that weren’t even touched.
Once you have a backup and you’re done isolating and noting modified files, you’re ready to remove malware without flying blind.
How to Remove Malware Manually: A Step-by-Step Walkthrough
Manual removal gives you full control over exactly what you’ll clean and what stays intact. It also helps you understand where the infection is hiding rather than relying on automated cleanup tools.
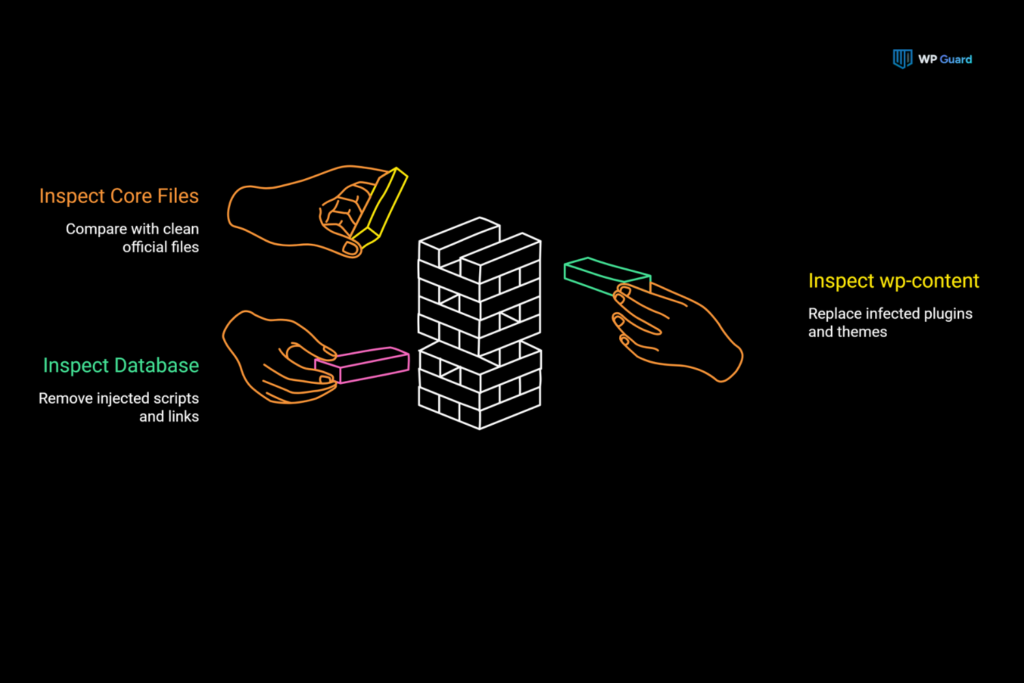
Here are the three areas you’ll need to work through, in order.
1. Checking WordPress Core Files for Malicious Code
Your WordPress file structure is the first place to inspect. Download a fresh copy of the platform from WordPress.org and compare it with your current installation. During comparison, any unexpected differences can point you straight to documents that need closer inspection.
Then you have to pay close attention to wp-config.php, index.php, and .htaccess files. These documents control how the CMS loads and behaves, which makes them attackers’ favorite location (wp-config.php is the first place attackers hide things).
Run this command to search your core files for suspicious code:
| bash |
| grep -rn “eval(base64_decode” /path/to/your/wordpress/grep -rn “gzinflate” /path/to/your/wordpress/grep -rn “<script” /path/to/your/php/files/ |
This code scans your PHP and JavaScript files for the most common malicious code patterns.
2. Cleaning Infected WordPress Files
We’ve pulled backdoors out of documents that looked completely normal at first glance. So don’t stop after scanning. It’s time to replace them with a few steps:
- Start with your wp-content folder
- Go through every plugin and theme files directory
- Compare them against fresh downloads from the source
- Delete files that don’t belong in a standard WordPress file structure
- Replace infected files with clean copies rather than trying to edit malicious code
Your wp-content directory often hides malicious files and hidden files tucked inside folders with random names. That’s why you have to use your file manager or WP-CLI to sweep through it:
| bash |
| wp core verify-checksumswp plugin verify-checksums –all |
Following those steps and code, you must carefully remove malicious scripts from every active theme and add-on. If you leave even one infected item behind, the whole problem will come back.
3. Removing Malware from Your WordPress Database
The WordPress database is where many infections hide after the files are clean. So you must export it first, then open it in a text editor and search for strings like “<script>”, “eval”, or any encoded content.
Afterwards, use phpMyAdmin to locate and clean injected rows. These queries will help you find malware signatures fast:
| sql |
| SELECT * FROM wp_options WHERE option_value LIKE ‘%eval(%’;SELECT * FROM wp_posts WHERE post_content LIKE ‘%<script>%’;SELECT * FROM wp_options WHERE option_name = ‘active_plugins’ AND option_value LIKE ‘%base64%’; |
You also need to check your wp-admin settings and WordPress posts tables carefully because attackers frequently inject hidden links and fake admin users into both.
Finally, reset all user accounts and credentials once the database is clean, and revoke any wp-admin access you don’t recognize.
WordPress Core Files: How to Restore and Verify Them
Even after a cleanup, corrupted core files can secretly keep your site vulnerable. To reduce the risk, our team re-installs the WordPress core files on every single job, without exception.
And the quickest way to reinstall is through WP-CLI. This single command forces a fresh download of every core file without touching your content or settings:
| bash |
| grep -rn “eval(base64_decode” /path/to/your/wordpress/grep -rn “gzinflate” /path/to/your/wordpress/grep -rn “<script” /path/to/your/php/files/ |
From there, compare your wp-config.php against a clean template to catch any unauthorized modifications the initial malware cleanup may have missed. Sometimes, your hosting provider supplies a reference copy if you don’t have one.
Check file permissions across your web server directories too. After all, loose permissions on core WordPress files are one of the most overlooked entry points after a cleanup.
Now that your site is clean, the next step is closing the doors that let the infection in.
Security Issues That Let Malware Back In
Nine times out of ten, the infection came through a plugin the site owner forgot they installed. That said, removing the threat is only half the job. If the original security weakness stays in place, the attacker can use it again.
Let’s have a look at the three most common security issues that bring malware back.
Outdated Software
Outdated WordPress installations are one of the major open doors for attackers. As developers continue to fix newly discovered vulnerabilities, delaying updates gives attackers more opportunities to exploit older versions.
In this case, maintaining plugins and themes carefully reduces potential entry points and cuts off the most common reinfection paths. You should also run a vulnerability scanning check after every update to confirm nothing slipped through.
Nulled Themes and Plugins
Nulled software (pirated or cracked software) almost always carries hidden backdoors combined into the code. In many malware investigations, those secret entries turn out to be the original entry point attackers used to compromise the website.
A more concerning thing is that antivirus software won’t always catch those backdoors, since attackers often disguise them as legitimate functions.
Weak Credentials and Permissions
A hacked website is rarely the result of sophisticated hacking. Several times, weak passwords and loose file permissions help hackers to exploit.
For that reason, you should:
- Reset every password across all user accounts after a cleanup
- Tighten file permissions on sensitive directories
- Make sure no leftover infected files are sitting in folders
From our experience maintaining sites, reinfection after a hacked WordPress cleanup usually traces back to one of these three.
How to Protect Your WordPress Site After Cleanup
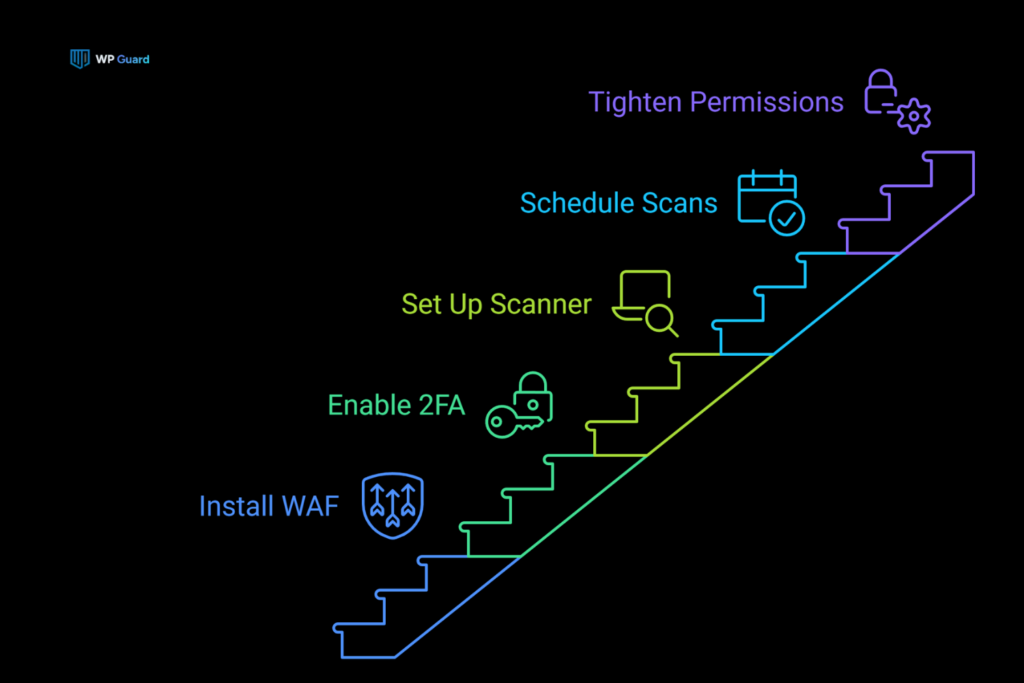
After cleanup, protect your site by setting up a security plugin, enabling two-factor authentication, and scheduling regular malware inspections. Most of this takes under 15 minutes to configure and saves your site from further attack.
Check the core protection steps every website needs after a malware removal:
- Step 1: Install a Web Application Firewall: A web application firewall filters malicious traffic before it reaches your files. Most WordPress security plugins include one out of the box, so don’t forget to install it.
- Step 2: Enable Two-Factor Authentication: Two-factor authentication blocks unauthorized login attempts even with a stolen password. That’s why admin users should enable it across every wp-admin account, no exceptions.
- Step 3: Set Up a Malware Scanner: WordPress malware removal plugins like the free version of Wordfence or the Malcure malware removal plugin cover malware detection in a single install. Basically, Malcure detects 50,000+ types of known malware, which makes it a solid free plugin option for site owners who can’t pay.
- Step 4: Schedule Regular Website Scans: Scheduled website scans run silently in the background and flag reinfections while they’re still easy to remove. So set your site up to run a website scanner at least once a week.
- Step 5:Tighten File Permissions: Loose file permissions on sensitive directories give attackers an easy way back in. To prevent it, you must tighten them across your web server after every cleanup.
Set these steps up now, and your WordPress security posture is more organized and secure than it was before the infection.
Your Site Deserves Better Than a Malware Problem
A hacked WordPress site is a serious technical headache. It hits your search rankings, your visitors’ trust, and your reputation as a website owner all at once.
Even so, malware removal doesn’t have to be overwhelming. Follow the steps in this guide, keep your security plugins updated, and schedule regular threat scans. Most WordPress users who get hit once never want to go through it again.
If attackers have compromised your WordPress website, or you just want to make sure it hasn’t, WP Guard is here to help. We will monitor, maintain, and protect your site around the clock. No shortcuts, no missed backdoors.
Reach out to us today, and let’s sort all the maintenance issues.
Frequently Asked Questions about WordPress Malware Removal
Most site owners have these common questions once they clean the malware.
1. Can malware come back after removal?
Yes, if you don’t close the entry point properly. To ensure the removal, run a full inspection after cleanup and check Google Search Console for blacklist flags. Finally, you have to submit a review request if Google flagged your website.
2. Is manual removal better than using a malware scanner?
Both serve different purposes. A malware scanner surfaces malware signatures fast, while manual removal catches malicious code and hidden backdoors automated tools sometimes miss.
3. Do security issues always show visible symptoms?
Not always. Some infections even run silently for weeks, injecting search engine optimization spam without a single visible error. So you need a WordPress malware removal service from real experts to ensure no malicious scripts or secret entries remain.